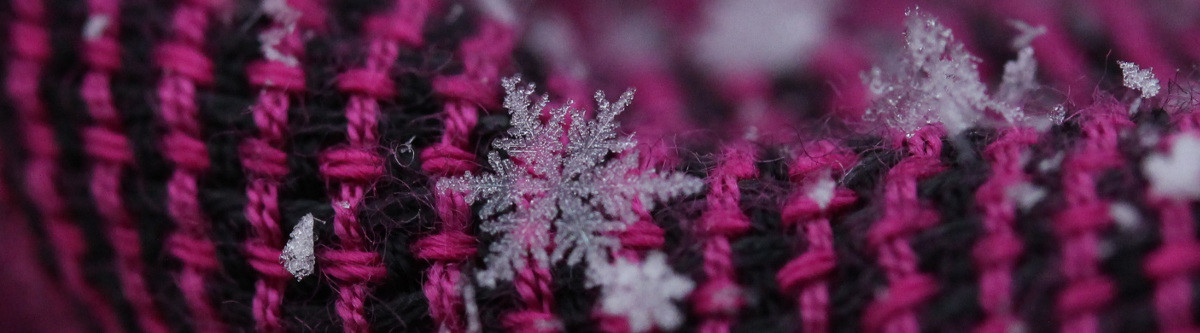
The snowflake is without a doubt one of the majestic wonders with which nature never ceases to amaze us. Depending on the geographical location in which you are, you can enjoy a beautiful and soft fall of flakes or you will suffer the consequences of a heavy snowfall. It is important to note that not all areas have the necessary environmental conditions for the formation of flakes and for their subsequent precipitation.
How do snowflakes turn into snow?
Snowflakes are formed from a drop of water that 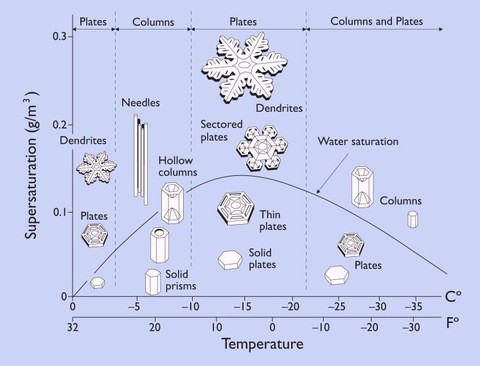 freezes around a particle. Once the drop of water has solidified, it acquires a hexagonal prism shape that will only change if more drops of water freeze at their tips.
A single ice crystal is made up of several dozen individual crystals that, when frozen one on top of the other, give rise to flakes of different shapes. The amount of water and atmospheric pressure are other factors that influence their shape. Experts say that there are no two naturally formed flakes that exactly match in shape, like people’s fingerprints.
Precipitated snow can be classified into different types depending on factors such as prevailing humidity or density per square meter, the most popular on ski slopes, in addition to powder snow, are wet, hard or spring.
Snow compacted on slopes by grooming machines specially designed for this purpose is the most recommended for those who start skiing as it allows curves and braking on a smooth surface.
The most common shapes of snowflakes are:
– Simple prisms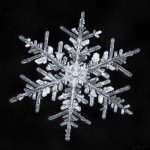
– Starry sheets
– Sector sheets
– Triangular crystals
– Dodecahexagonal crystals
– Hollow Columns
– Needles
– Stellar dendrites
– Fern-shaped stellar dendrites
– Artificial snow
When does a flake or hail form?
Snow forms when the ambient temperature is at or a few degrees below freezing, causing the water vapor in the clouds to slowly condense, crystallize, form flakes, and fall as soft precipitation.
Hail, unlike snowflakes, are irregularly shaped ice particles that fall in precipitation of varying intensity. For this natural phenomenon to occur, it is necessary that the ambient temperature is well below -0 ºC, since the temperature is so low, the process of freezing and precipitation is usually quite fast. The size of these particles can be varied, from very small to large balls, which cause damage to people, cars and homes.
Tutorial to make a paper flake at home

Do you want to create snowflakes identical to real snowflakes? Well, follow these simple steps and you will have beautiful snowflakes in a few minutes! It’s easy, you just need:
- square paper
- A pen or pencil
- Scissors:
Step 1: Fold our square sheet diagonally so that we bring one end to the other end forming a triangle
Step 2: We need to mark the midpoint of a long side of the formed triangle (hypotenuse), for this we will bring one end to another again forming a smaller triangle but without completing it, we only mark it.
Step 3: We will take each of the points of the hypotenuse to the middle of the opposite side of the triangle, formingimage  a kind of wings.
Step 4: We adequately press all the folds.

Step 5: We now have a figure ready to draw. With the pen we will mark the areas to be cut, the more complex the drawing, the more beautiful the resulting figure will be. For the basic snowflake we will mark the tip with a 1 centimeter square.
Step 6: Starting from the lower point of the figure to which we have just cut a piece, we will first mark the right side, to do this we will draw a one-centimeter border, moving towards the center each centimeter and drawing some pointed figures.
Once the figure is finished, these will be the arms of each of the peaks of the codend.

Step 7: We will cut this side and with the resulting part, we will use to mark the opposite side of the triangle and thus maintain symmetry for the final figure.
Step 8: We will unfold carefully and… We already have our codend!
Now you can practice with different shapes and enjoy the hundreds of resulting flakes that you can form by slightly varying the cutouts!